
DHL Setup
For ShipRite Global Connect
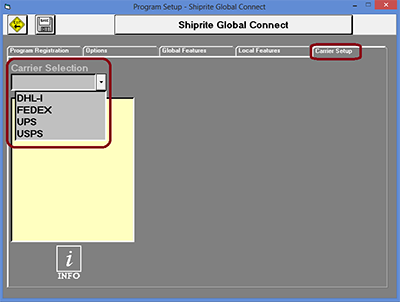
This section covers carrier setup for DHL. To access the carrier setup:
- From the ShipRite main menu, click the ‘Setup’ tab, then click ‘General Setup Options’.
- Next, click the ‘Carrier Setup’ tab to the right.
- From the Carrier Selection menu, choose which carrier to setup.
SETUP DHL ACCOUNT:
- Setup DHL Account Number
You have to perform this task on the server computer.
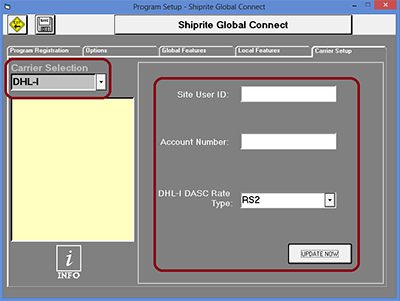
- Go to Setup > General Setup Options > Carrier Setup > DHL-I.
- Enter in your DHL account number. Also in this same screen verify that you have the correct rate type selected (RS1, RS2, or RS3).
- Click the “Update Now” button.
- Setup DHL Label Printer
- To setup the label printer, in the same setup screen click on “Local Features” and click on “PRINTER-DHL Label”.
- If you are not sure which printer to select you can click on the “PRINTER – Eltron/Zebra” or “PRINTER – FEDEX Thermal Labels” setting and see what printer option is selected in there.
- Use that same option for the “PRINTER-DHL Label” and click “Update Now.” If a pop up box asks you if it’s a thermal printer, say, “YES.” As of now we will not support printing DHL labels on 8.5×11 sheets.
- You have to set the label printer individually on each workstation.